On October 20th 2020 VMware released NSX-T version 3.1 (release notes).
Upgrade from version 3.0
I’ll outline the process of upgrading from version 3.0.x to version 3.1. In the example shown, a base version 3.0.2 is upgraded, but the process is the same for all versions from 3.0.
Requirements
We’ll need an upgrade bundle (MUB) from VMware download site (login required).
Upgrade
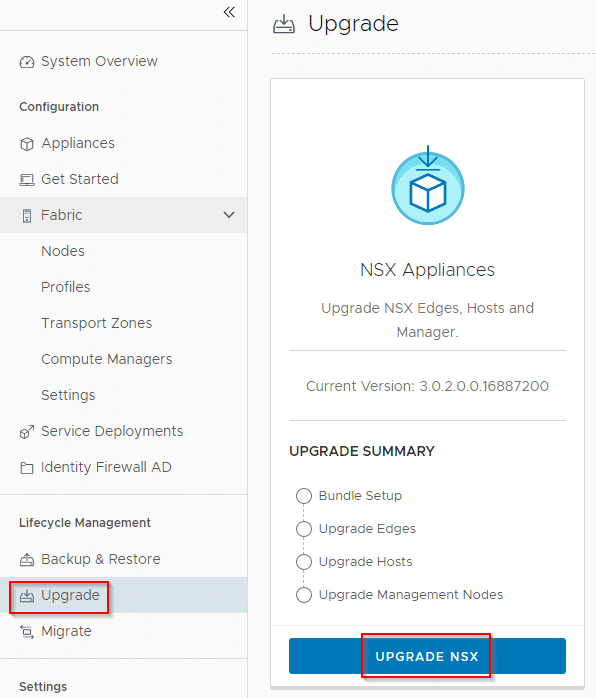
First we need to login to NSX-T Manager. Go to section Lifecycle Management and select Upgrade. You’ll see your current version on the right. Start the process with Upgrade NSX.
ESXi on Intel x86 architecture has been a commodity for many years now. In recent years and during VMworld for example we’ve seen early alpha versions of ESXi running on Arm architecture like smart NICs or even Raspberry Pi. Meanwhile VMware developers published a Fling named ESXi Arm Edition to deploy ESXi on Arm architecture. Of course this is a lab project and not supported by VMware for production workloads. But anyway, it’s a great opportunity to play around with ESXi on a cheap and tiny computer like Raspberry Pi. I will not explain how to deploy ESXi on Arm. Check the detailed documentation on the Fling project page (PDF). I will focus on day-2 operation.
I would like to thank William Lam for providing a lot of background information, hacks and tricks around PhotonOS and ESXionArm.
Now I’ve got an ESXi host on my Raspi. What can I do with it?
Just a few remarks before we start:
You can’t run any workload on the ESXi on Arm platform. As the project name says, it’s an Arm architecture, So you can’t run operating systems based on Intel architecture. All guest VMs need to be made for Arm architecture. That will rule out Windows guest systems and also most Linux distributions. But luckily there are a couple of Linux distributions made specific for Arm architecture like Ubuntu Server for Arm, or Photon OS. For my demonstration I chose the latest Photon OS (version 4 beta). As host hardware I’m using the “big” Raspberry Pi 4 with 8 GB RAM. You can imagine that 8 GB of RAM isn’t very much for host OS and guest VMs. We have to use resources sparingly.
Heat sink for Raspberry Pi4 (your Raspi will become hot without)
SD-card (only for UEFI BIOS)
USB stick for ESXi installation
USB 3 hub with external power supply (Raspi doesn’t provide reliable power on USB port for an NVMe SSD)
USB 3 NVMe M.2 case
Samsung NVMe EvoPlus 250 GB M.2
Using ESXi on Arm in standalone mode
Although I have joined my ESXi on Raspi to my vCenter 7, I will not use any vCenter features. All works are done like on a standalone ESXi (with all the shortcomings and limitations).
First we need 3 VMs for the 3 K3s nodes. It’s a good idea to build a VM with everything we need except K3s and then clone it. Well, if you think cloning a VM on a standalone ESXi on Arm host is just a mouse click in the UI, then welcome to the real world. 😉 I will come to that point later. Let’s build our first Photon OS VM.
Working with templates has become much easier in vSphere 7 since VMware added new features to content libraries. It is now possible to deploy VMs directly from templates in content libraries and to update templates while the orignal version stays in place.
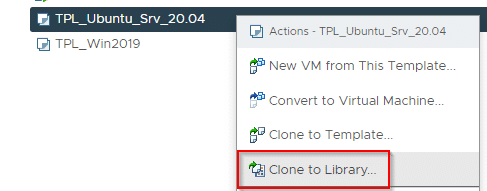
If there are still classic templates in vCenter, you can clone them to a content library.
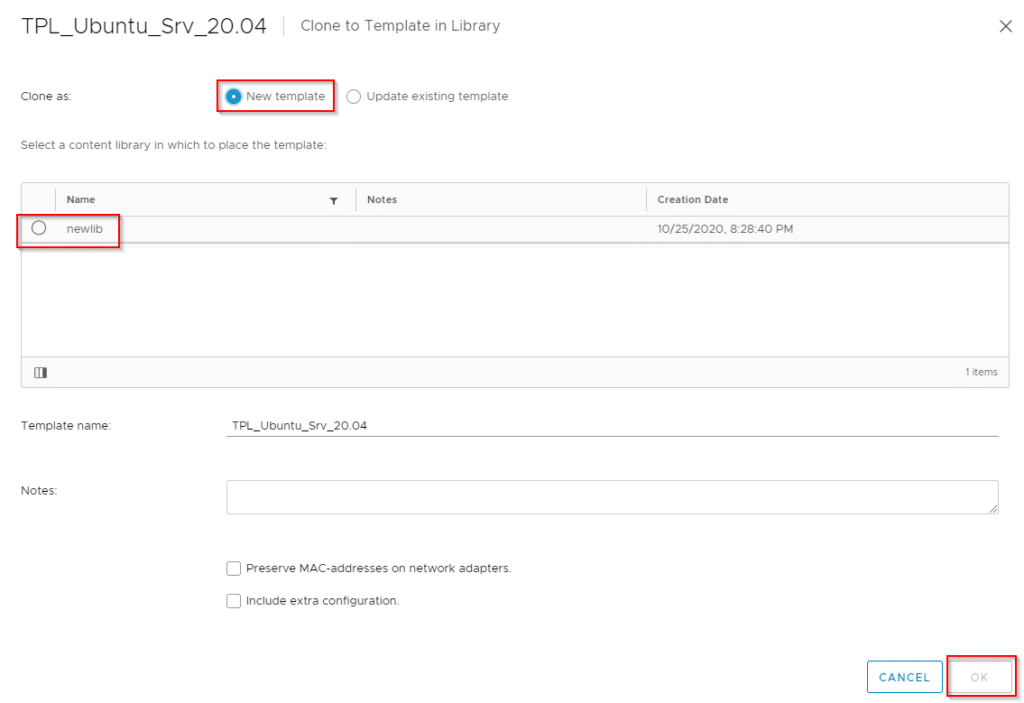
Transfer the old template to the content library as a new template.
Failed to export OVF package
After klicking OK, an error message “Failed to export OVF package” might be issued. Usually followed by a second message that leads to the root cause of the problem.
File ds:///vmfs/volumes/vsan:527a6824b9bfa7ad-36f48a2cd78b9685/1f40b55e-f88d-e569-9d66-002590bb2ed0/b02cb65d-e81b-49cb-a654-ef26ea21b2f7/ubuntu-20.04-live-server-amd64_5696e54c-c62a-4fa8-b007-0192a28ff53d.iso was not found
The only interesting part of the message are the last four words: “iso was not found“. Obviously the VM had an iso image mounted before it was converted to a template. Luckily that problem is easy to resolve by converting the template into a VM and removing the iso image from CD-ROM settings. Change it to “Client Device” for example. Convert the VM back to a template and retry cloning to content library. Without a mounted iso image the conversion works without an error.
Updates to the vCenter Server Appliance (VCSA) are usually easily done from the VAMI interface. In rare cases, however, problems may occur during the update. Recently I tried to update the VCSA in the lab from version 7.0.0 (16386335) to 7.0.0 U1 (16858589). The update was started via a locally mounted ISO image. It was detected that an update is available, but the update failed right after start. The problem referenced in the link above did not apply in this case.
In such cases it is worthwhile to try the VCSA shell. To do this, it must first be allowed in VAMI, then the session can be established via SSH client.
It is important that you’re NOT on the bash shell. You can return from bash to the VAMI shell with the command below.
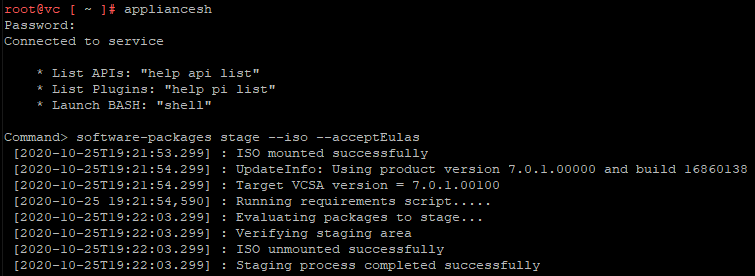
appliancesh
In the first step the update packages are staged. The ISO should be mounted at this time.
software-packages stage --iso --acceptEulas
The process checks some requirements, detects source- and destination version and tests for a mounted iso.
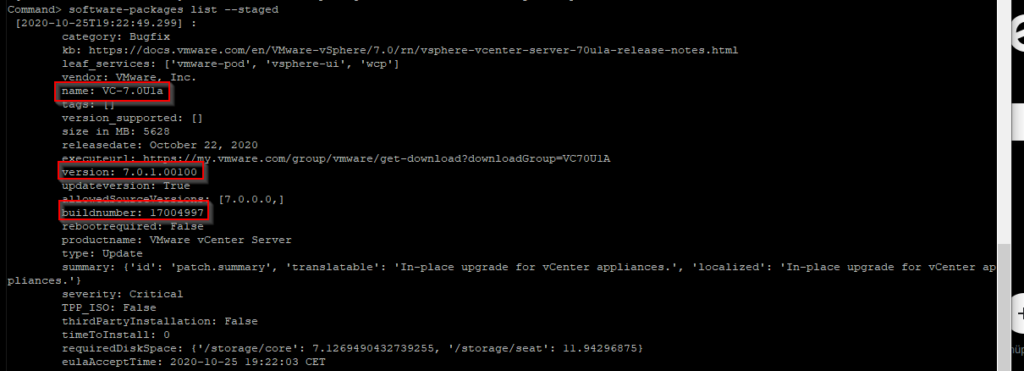
software-packages list --staged
The command listed above will show details to the staged package.
If everything looks correct we can trigger the update.
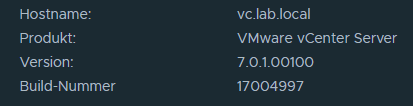
software-packages install --staged
The update to version 7.0 U1 finished without any issues.