Backing up and restoring an ESXi host configuration is a standard procedure that can be used when performing maintenance on the host. Not only host name, IP address and passwords are backed up, but also NIC and vSwitch configuration, Object ID and many other properties. Even after a complete reinstallation of a host, it can recover all the properties of the original installation.
Recently I wanted to reformat the bootdisk of a host in my homelab and had to fresh install ESXi for this. The reboot with the clean installation worked fine and the host got a new IP via DHCP.
Now the original configuration was to be restored via PowerCLI. To do this, first put the host into maintenance mode.
Set-VMhost -VMhost <Host-IP> -State "Maintenance"
Now the host configuration can be retored.
Set-VMHostFirmware -VMHost <Host-IP> -Restore -Sourcepath <Pfad_zum_Konfigfile>
The command prompts for a root login and then automatically reboots. At the end of the boot process, an empty DCUI was welcoming me.

I haven’t seen this before. I was able to log in (with the original password), but all network connections were gone. The management network configuration was also not available for selection (grayed out). The host was both blind and deaf.
I managed to activate the ESXi shell via the troubleshooting options. You can toggle screens with [Alt]+[F1]. First I checked the physical NICs.
esxcli network nic list

All NICs are present and up.
The next step was to check the vSwitches. The original system had standard vSwitches and distributed vSwitches.
esxcli network vswitch standard list
No results.
esxcli network vswitch dvs vmware list
No results.

Obviously the host had lost all vSwitches after restoring the configuration. All kernel ports, port groups and settings were lost as well. The host belonged to a 4-node vSAN cluster and my ambitions to reconfigure it “from scratch” were limited.
Try an alternate configuration
made it my standard procedure to back up the configuration of the hosts before each upgrade. Maybe there was a problem with the latest configuration or the latest ESXi ISO. Thus, I also had older configurations of ESXi 7 U3, as well as ESXi 7 U2a available. Unfortunately the result was always the same. An empty DCUI. In the last resort, I reverted to a backup that was more than a year old. This was based on ESXi 7 U1 (build 16850804). I got the appropriate ISO and tried the restore again. This time with success!
Where’s the difference?
It was possible to explain that one configuration is defective. But that all configurations of the last year should be damaged is extremely unlikely. The question that came to my mind was why the restore worked with the old U1 configuration and not with all the more recent ones. I noticed that I hadn’t deployed NSX-T in the lab at the time. That led me to a clue.
If we install a standard ESXi image, then it will not contain NSX kernel modules. This can be checked with the command below:
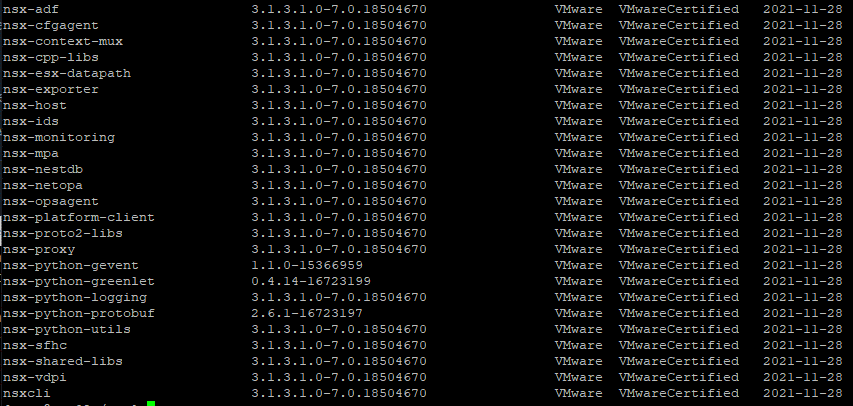
esxcli software vib list | grep nsx
In a default installation, the command returns no matches. A configured NSX-T transport node, on the other hand, returns numerous hits.

At the least, this is where the penny dropped for me. The host was simply missing the NSX-T kernel modules referenced in the configuration and the restore ends up as an ESXi zombie.
The proper procedure
Before restoring the configuration, the missing NSX-T kernel modules have to be deployed on the host. This normally happens automatically when the host is configured for NSX in the NSX-Manager (System > Fabric > Nodes > Host Transport Nodes > Managed by vCenter > Configure NSX). But this will not work because our host doesn’t have its configuration yet and is disconnected from the vSphere cluster. A chicken and egg problem.
Download NSX-T Kernel Modules and install
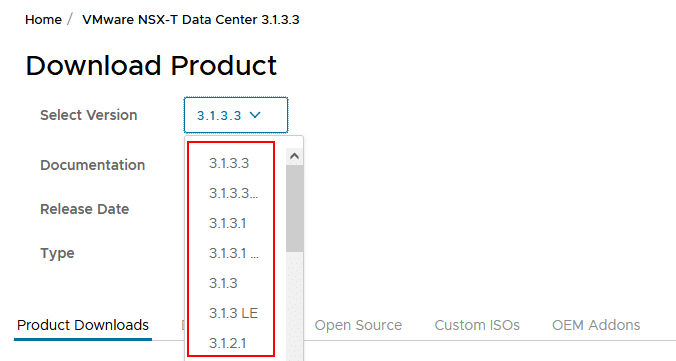
Fortunately, the modules can also be deployed manually. To do so, download the package “NSX Kernel Module for VMware ESXi 7.0” from VMware under “Networking & Security” > “NSX-T Datacenter” > “Go to Downloads”. Important: The matching package for your NSX-T installation must be selected.

For example, if you are running NSX-T version 3.1.3.1, you must also load the exact matching package (Select Version). The package is nsx-lcp-[version]-esx70.zip. The host should be in maintenance mode and the SSH service must be enabled. The package may be transferred via SCP.
scp <sourcepath> root@<esx>:<destinationpath>
You can see an example of the command from my environment. The package will be uploaded to /tmp.
scp E:\install\vmware\NSX-T\nsx-lcp-3.1.3.1.0.18504670-esx70.zip root@esx02.lab.local:/tmp/
Login with an SSH client and start setup from the shell.
esxcli software vib install -d /tmp/nsx-lcp-3.1.3.1.0.18504670-esx70.zip
After entering the command, nothing happens on the shell for a while. However, the setup is running in the background. Be patient and have some coffee!

You should reboot your host after installation of NSX-T modules. When the host is up again, you can continue with the configuration restore.
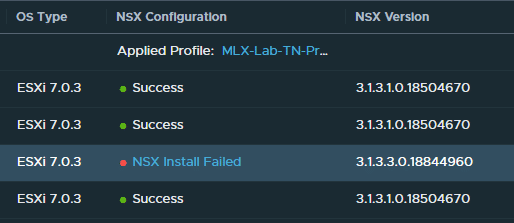
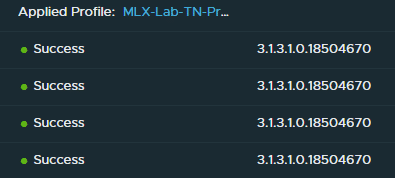
Side note: I had initially loaded the wrong package in the example above with a version slightly above my NSX-T version (3.1.3.3 instead of 3.1.3.1). The NSX-T manager refused to work with it. Therefore, the correct selection is key. Downgrading packages is easy and is done using the same command as above. Packages will be replaced if necessary.


Configuration Restore
As soon as your NSX-T kernel modules are in place you can restore the host configuration.
After reboot the host will most likely still be diconnected from the cluster. Just select the host in vSphere-Client > Connection > Connect.
Conclusion
Looking back the solution is quite obvious and simple. But this issue almost drove me nuts. I’ve never experienced a blank DCUI before. But instead of configuring the host from scratch, I did it the vExpert way. Test, reproduce, analyze and hopefully find an explaination for the phenomenon… and share the solution with the community.

