Joining Active Directory with vCenter Server Appliance (VCSA) has been simplified with every generation of VCSA.
I will show the workflow how to connect a VCSA 6.7 to an Active Directory source. The process differs a little, depending whether you’re using the HTML5-Client or the Web-Client (Flash).
Requirements
- VCSA hostname has to be FQDN and may not be an IP address.
- You need to login with a member of systemconfiguration admins, which administrator@vsphere.local is by default.
Workflow
The workflow is divided into three steps
- Join VCSA to ADS
- Reboot
- Add ADS as identity source
Step 1 – Join ADS
Flashclient
Login as SSO-Admin (administrator@vsphere.local)
Home > Administration > Deployment > System Configuration > Nodes > [select vCenter] > Tab „Manage“ > Active Directory > Join

HTML5 Client
Login as SSO-Admin (administrator@vsphere.local)
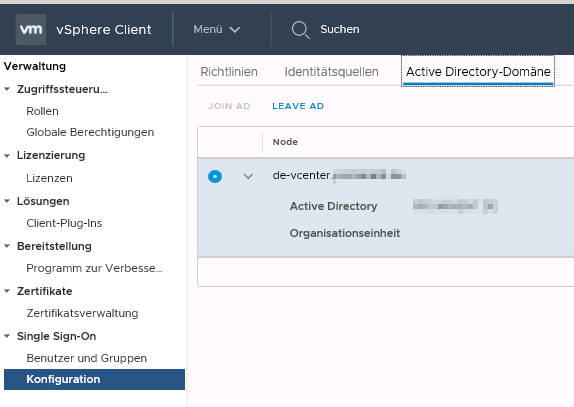
Menu > Administration > Single Sign-On > Configuration > Tab „Active Directory Domain“ > Join AD

Step 2 – Reboot VCSA
You need to reboot VCSA to apply settings. After reboot you’ll see a new computer object of VCSA in Active Directory.
Step 3 – Add identity source
To authenticate ADS users in vCenter, you need to add Active Directory as an identity source.
Flashclient
Login as SSO-Admin (administrator@vsphere.local)
Home > Administration > Single-Sign-On > System Configuration > Identity Sources > „+“
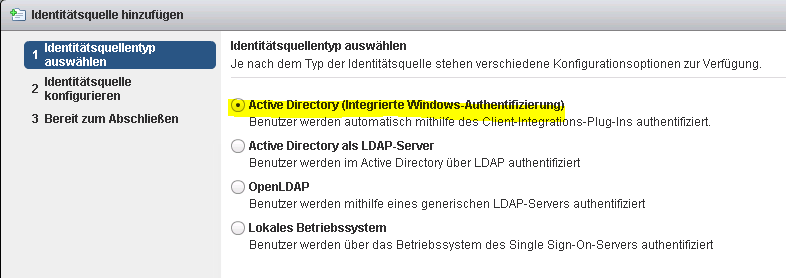
Choose Active Directory (Integrated Windows Authentication)

HTML5-Client
Login as SSO-Admin (administrator@vsphere.local)
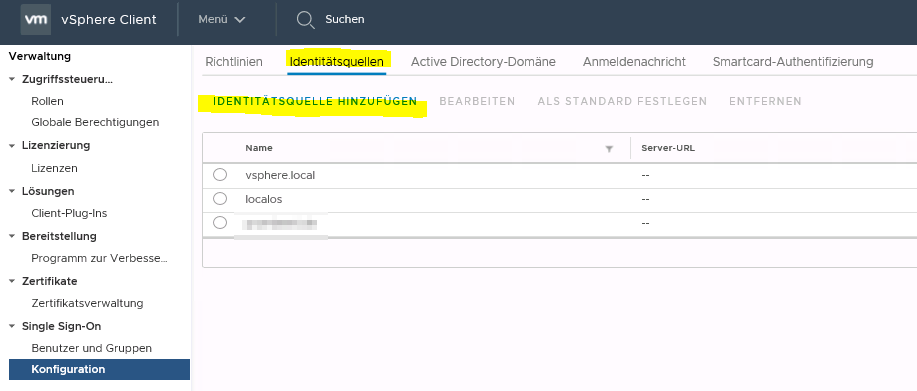
Menu > Administration > Single Sign-on > Configuration > Identity Sources > Add Identity Source

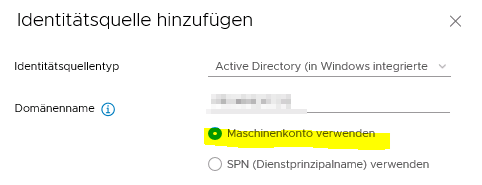
Choose Active Directory (Windows Integrated Authentication). Select “use machine account”.

